
使用 Hexo 来写博客的时候,经常会有想要在线编辑的需求,比如电脑不在身边啦,或等等的情况。一般来说可能都会搭配 CI 来使用(比如说我),当然还有另一种方案,那就是—— CMS(内容管理系统)
本文中可能有一部分用词不太准确,请您谅解 (呜呜,中文越来越退步了 ㅠ^
本文将会介绍如何为你的博客集成 Netlify CMS 并在线编辑和发布文章
本文便是使用 Netlify CMS 进行编辑并发布的文章
在 Netlify 上发布你的博客
首先,你需要将博客上传到 Github 并发布到 Netlify 上
打开 Netlify 并登录后,点击 New site from Git
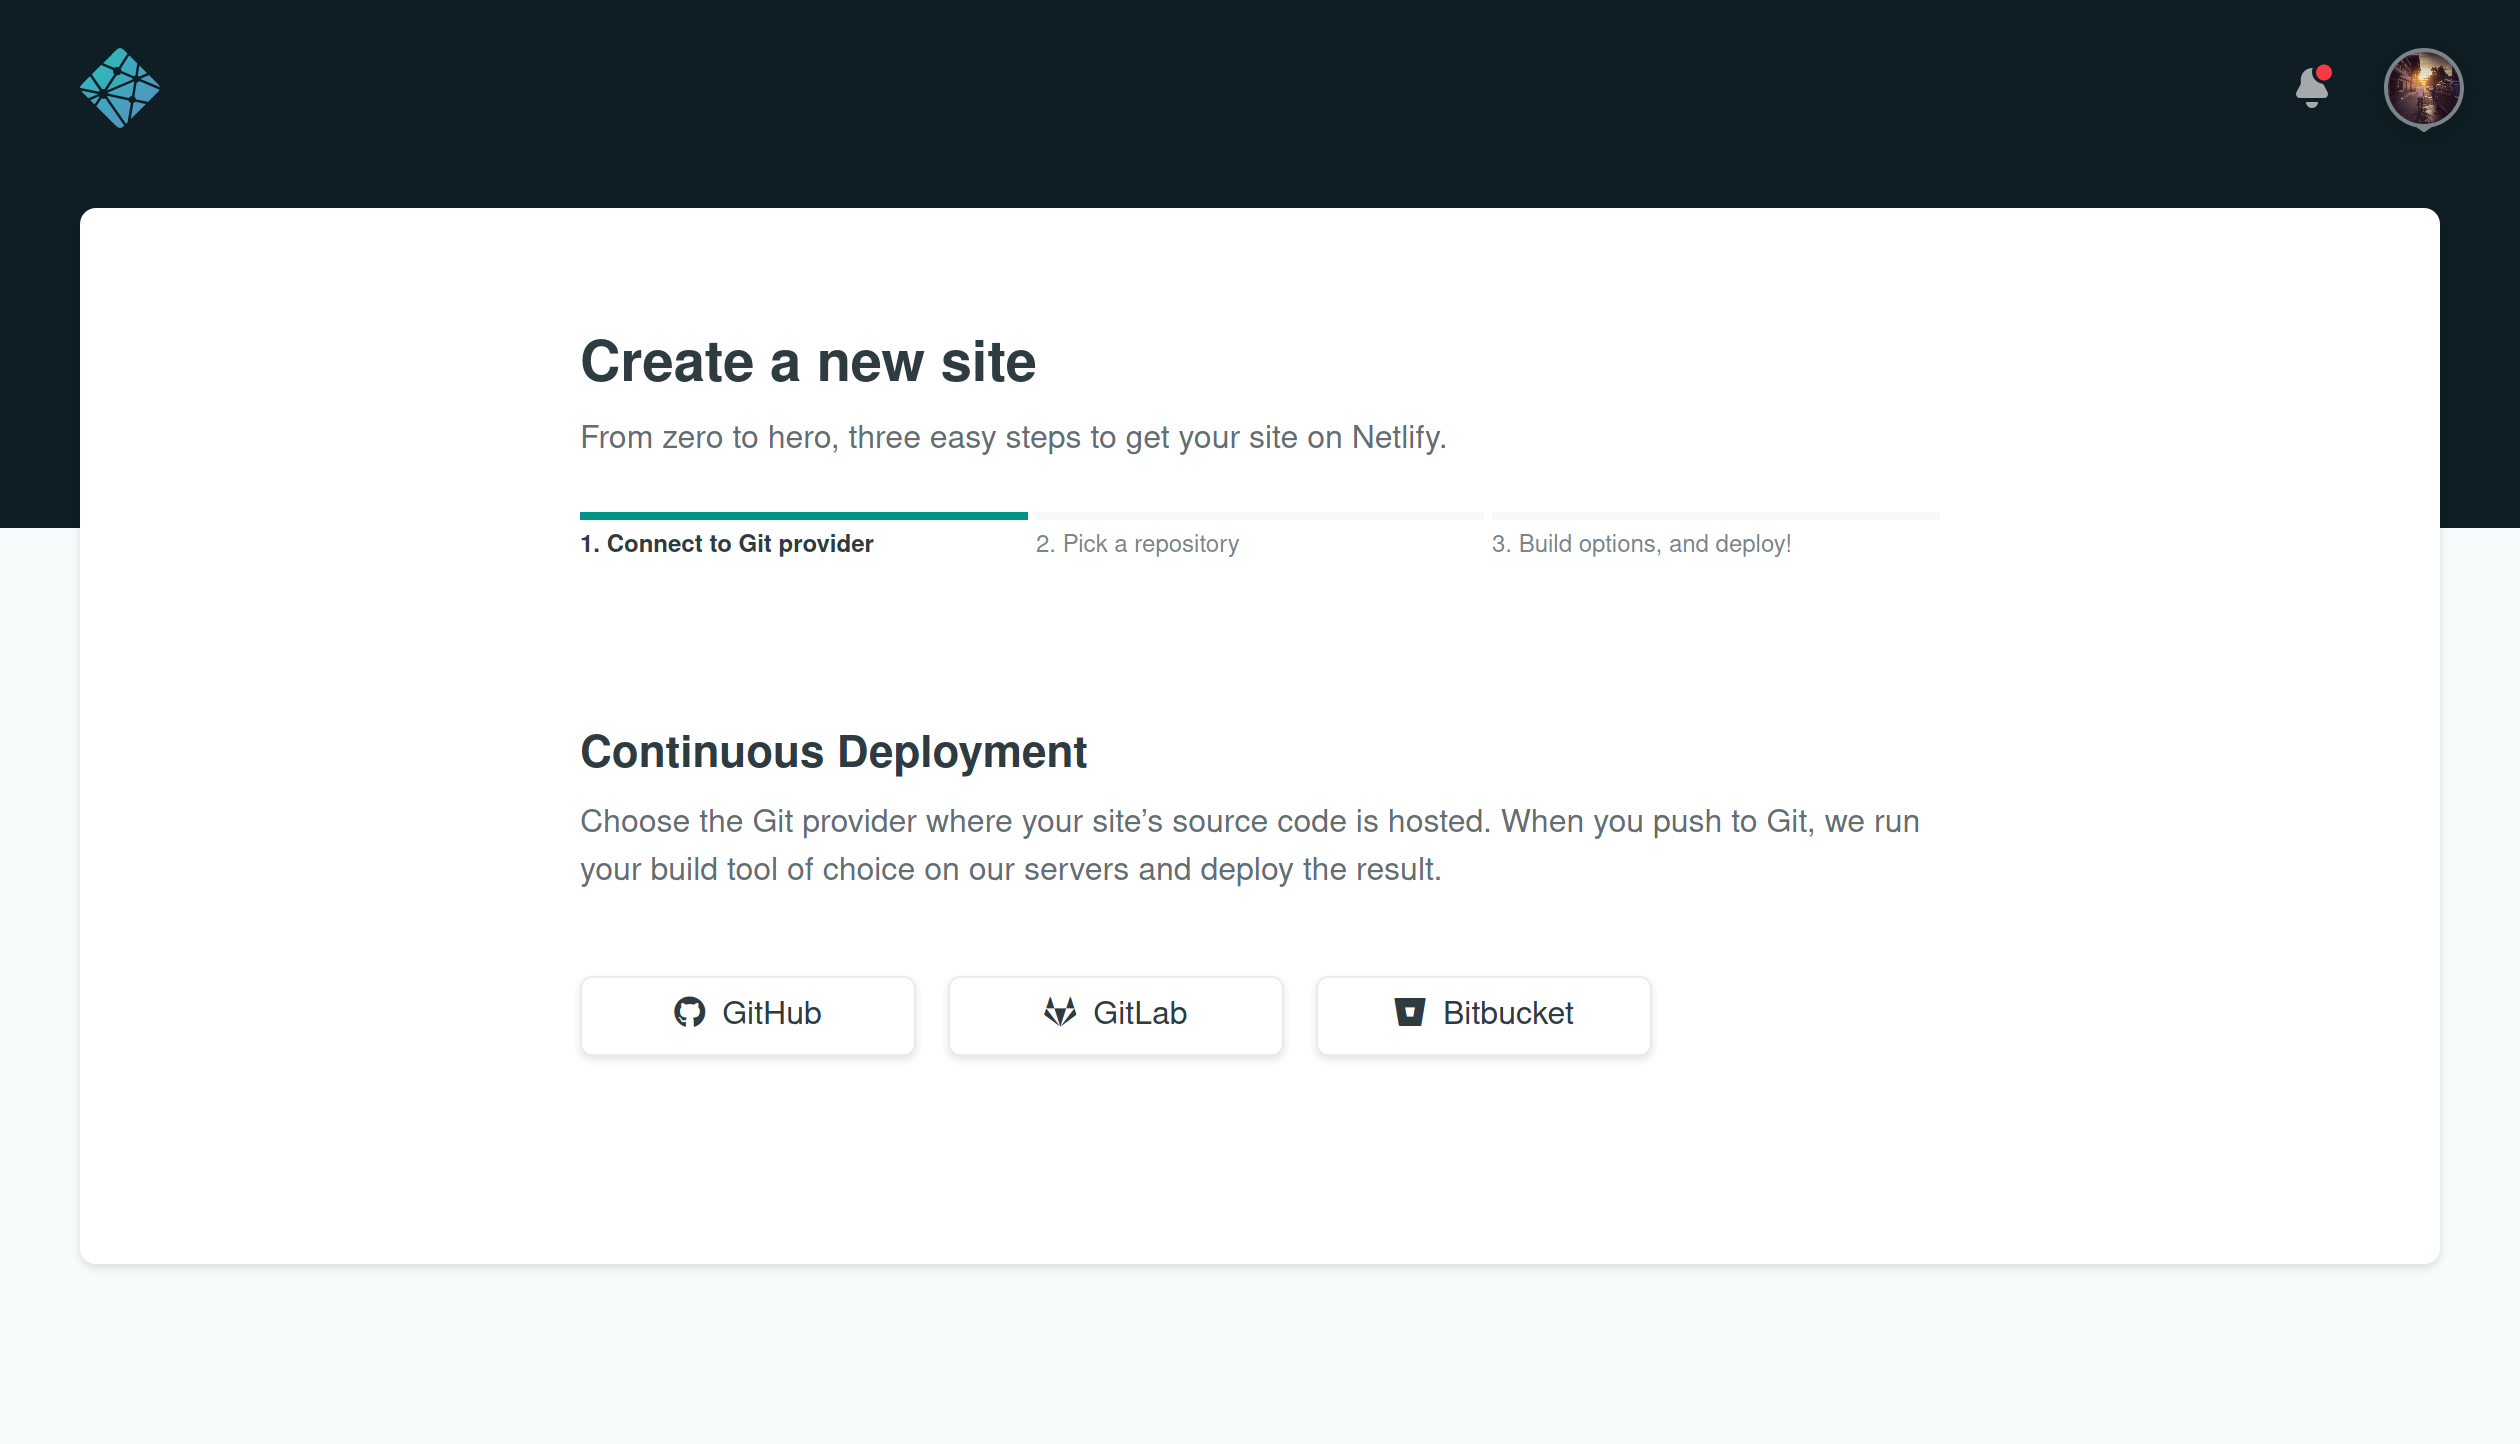
接下来,在 Build Command 中填写 hexo g
Publish directory 的目录则填写 public
如果您配置过 CI, 那么此处填写的命令与您之前 CI 的命令则比较类似
.png)
然后找到顶栏的 Settings 页面下的 Identity,点击 Enable Identity 启用身份管理
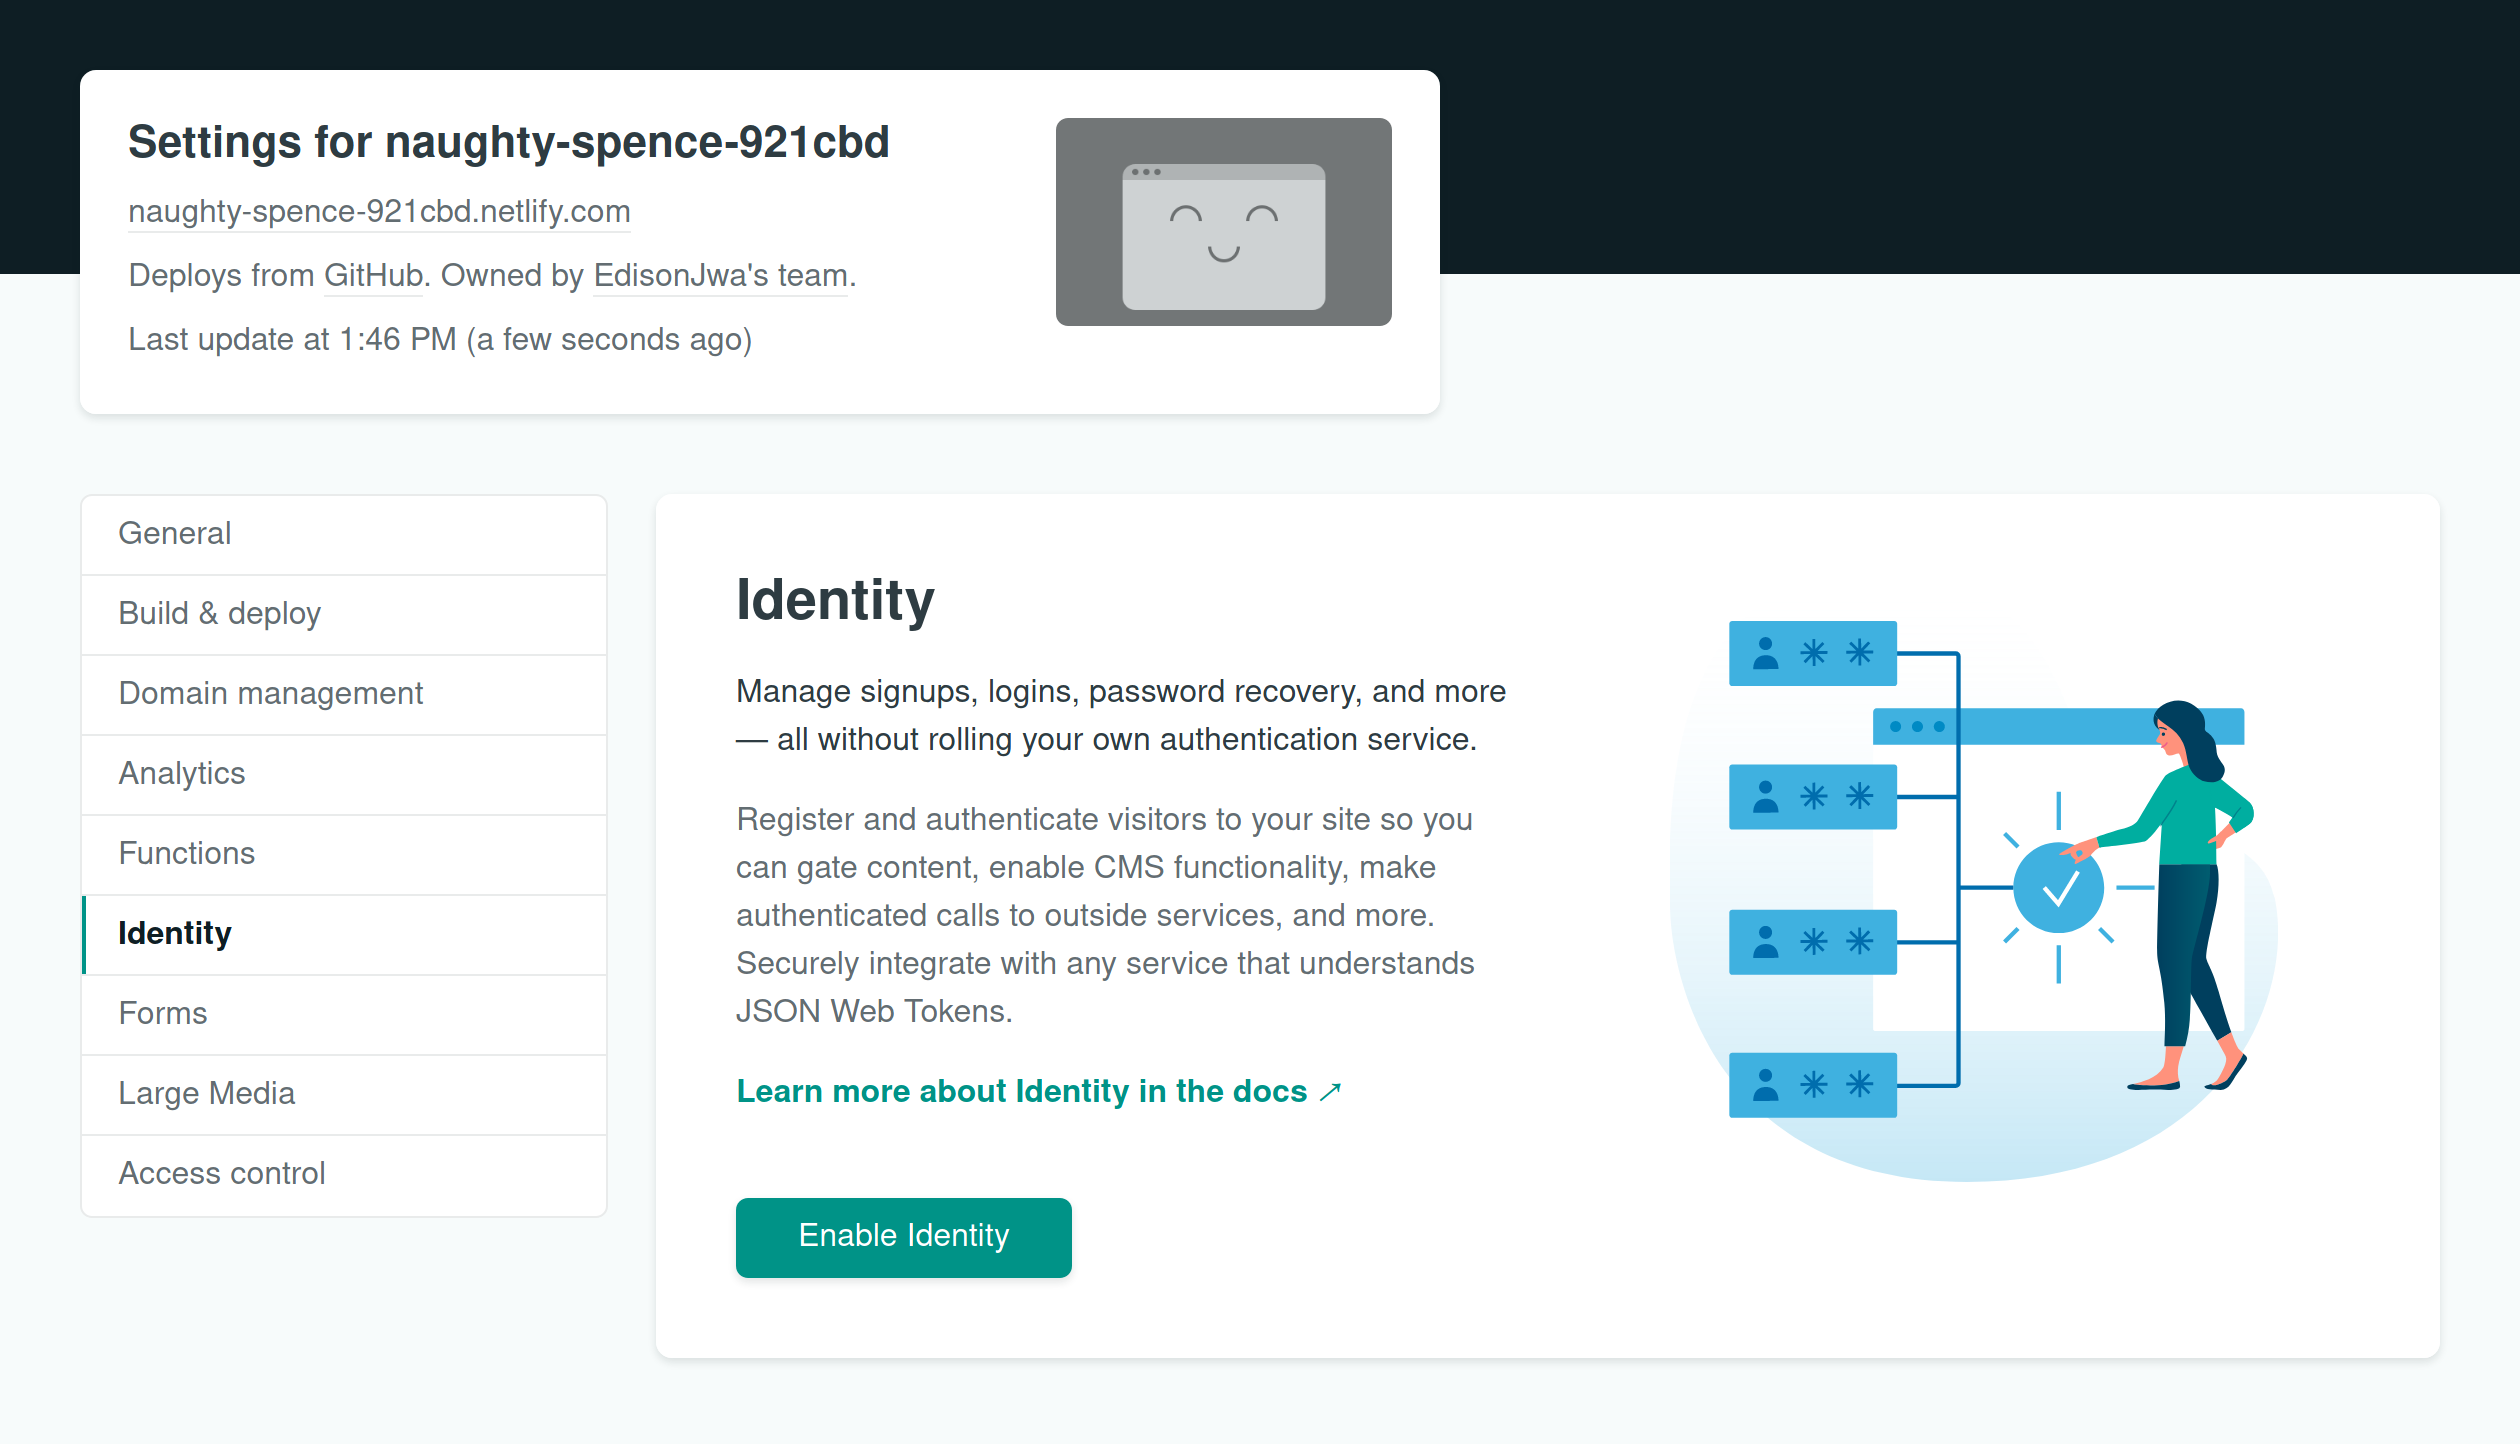
往下翻,找到 Registration ,将 Open 修改为 Invite Only
.png)
找到 Services 下的 Git Gateway 点击 Enable Git Gateway
.png)
Hexo 博客文件的配置
添加 Header
在博客的 Header 中添加一个 JS
1 | |
接下来,在 source 下 创建一个 admin 目录
这个目录的名称可以自行修改为其他名称,但确保后面操作的时候要和此处的名称一致
创建 index.html 文件并键入如下内容
1 | |
同样,在 admin 目录下 创建 config.yml 文件并输入如下内容
1 | |
在博客的配置文件 _config.yml 文件中的 skip_render 下添加
1 | |
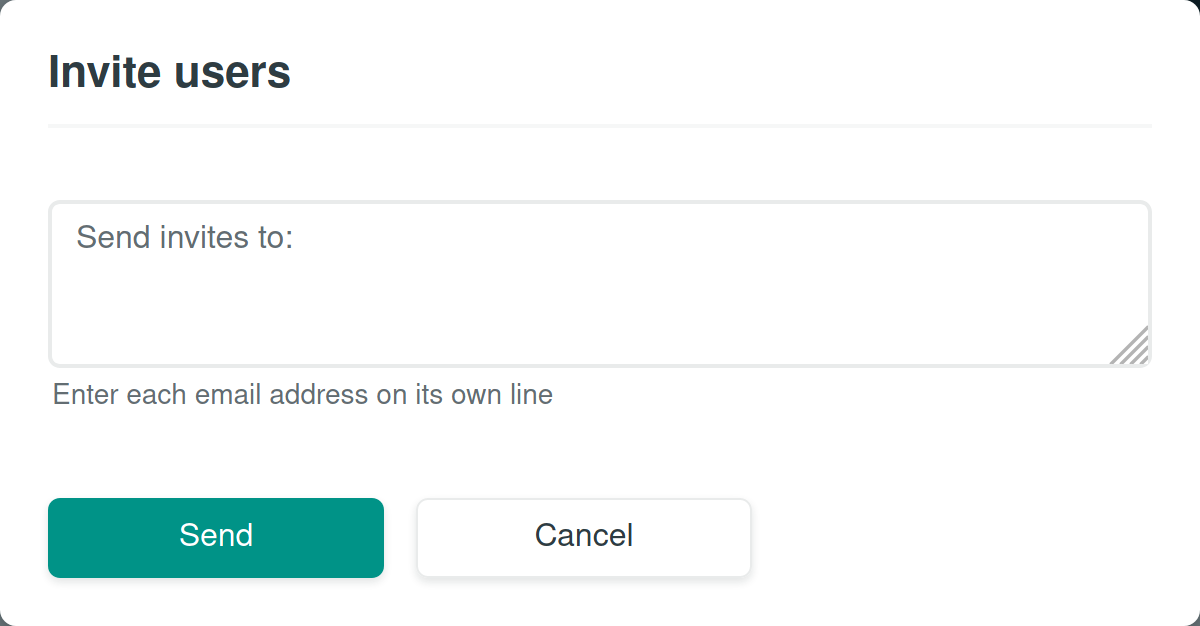
创建 CMS 帐号
接下来,我们开始创建 CMS 的帐号。在 Identify 页面点击 Invite user

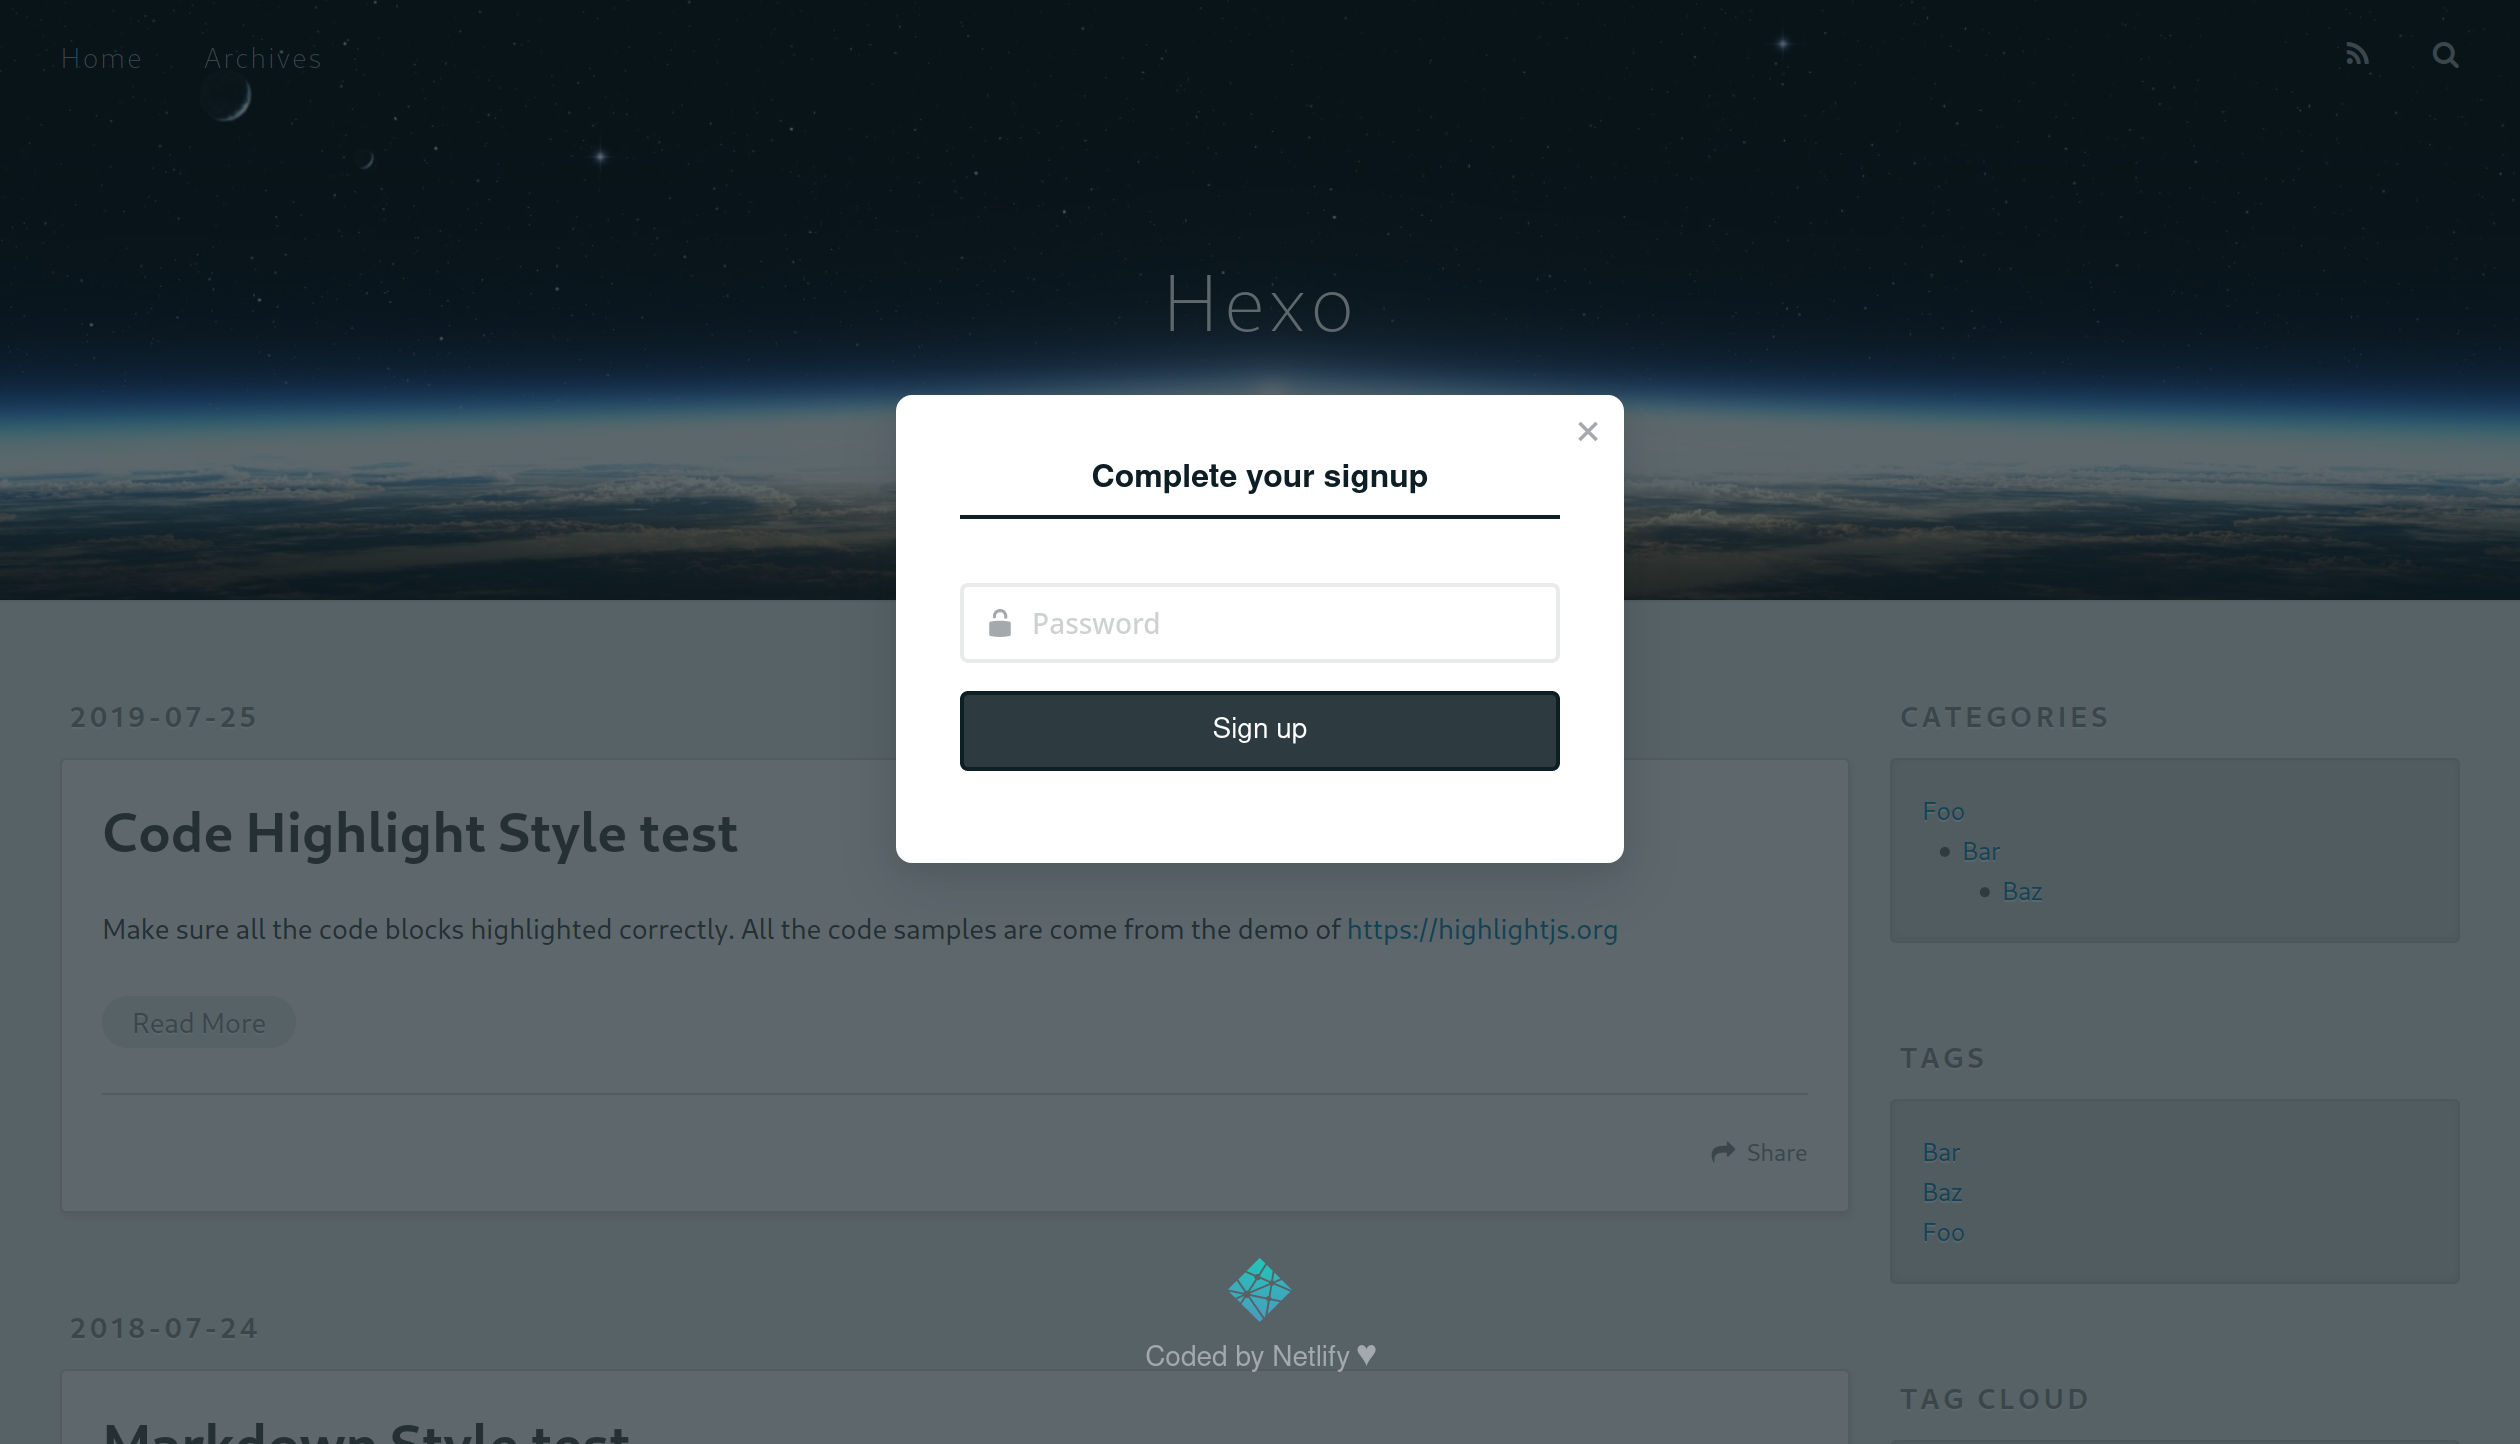
输入你的邮箱之后,点击确定
如果一切正常的话,此时你会顺利地在邮箱里收到一个邮件
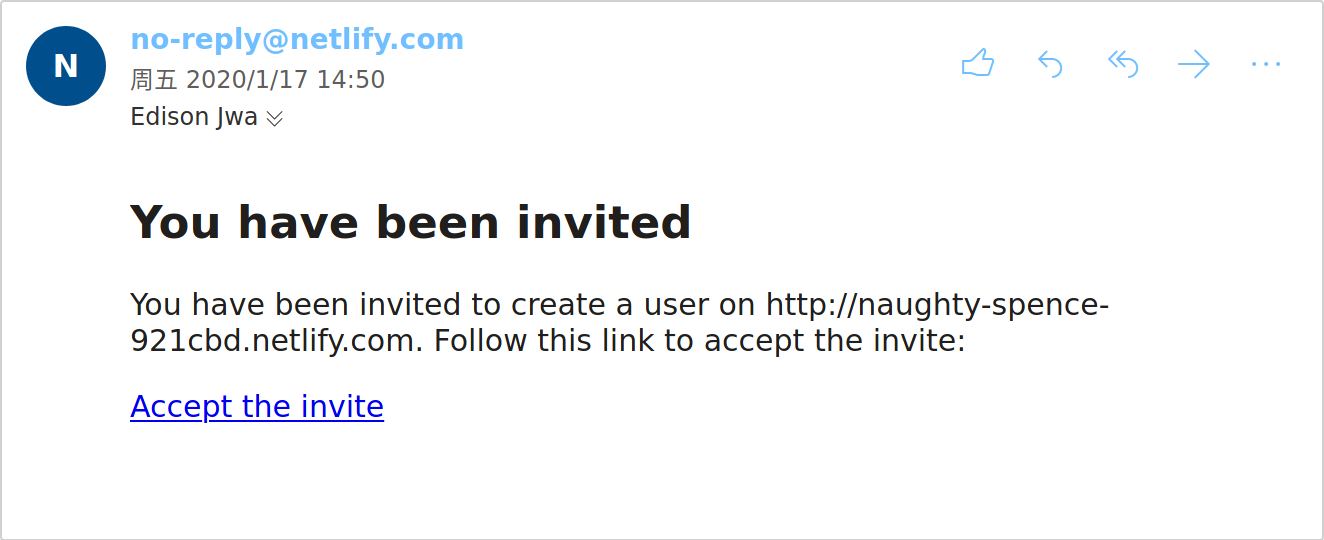
点击邮件中的链接,并设置密码后,访问 /admin 目录
这时没问题的话,你应该能顺利的看到你的博客上的文章了
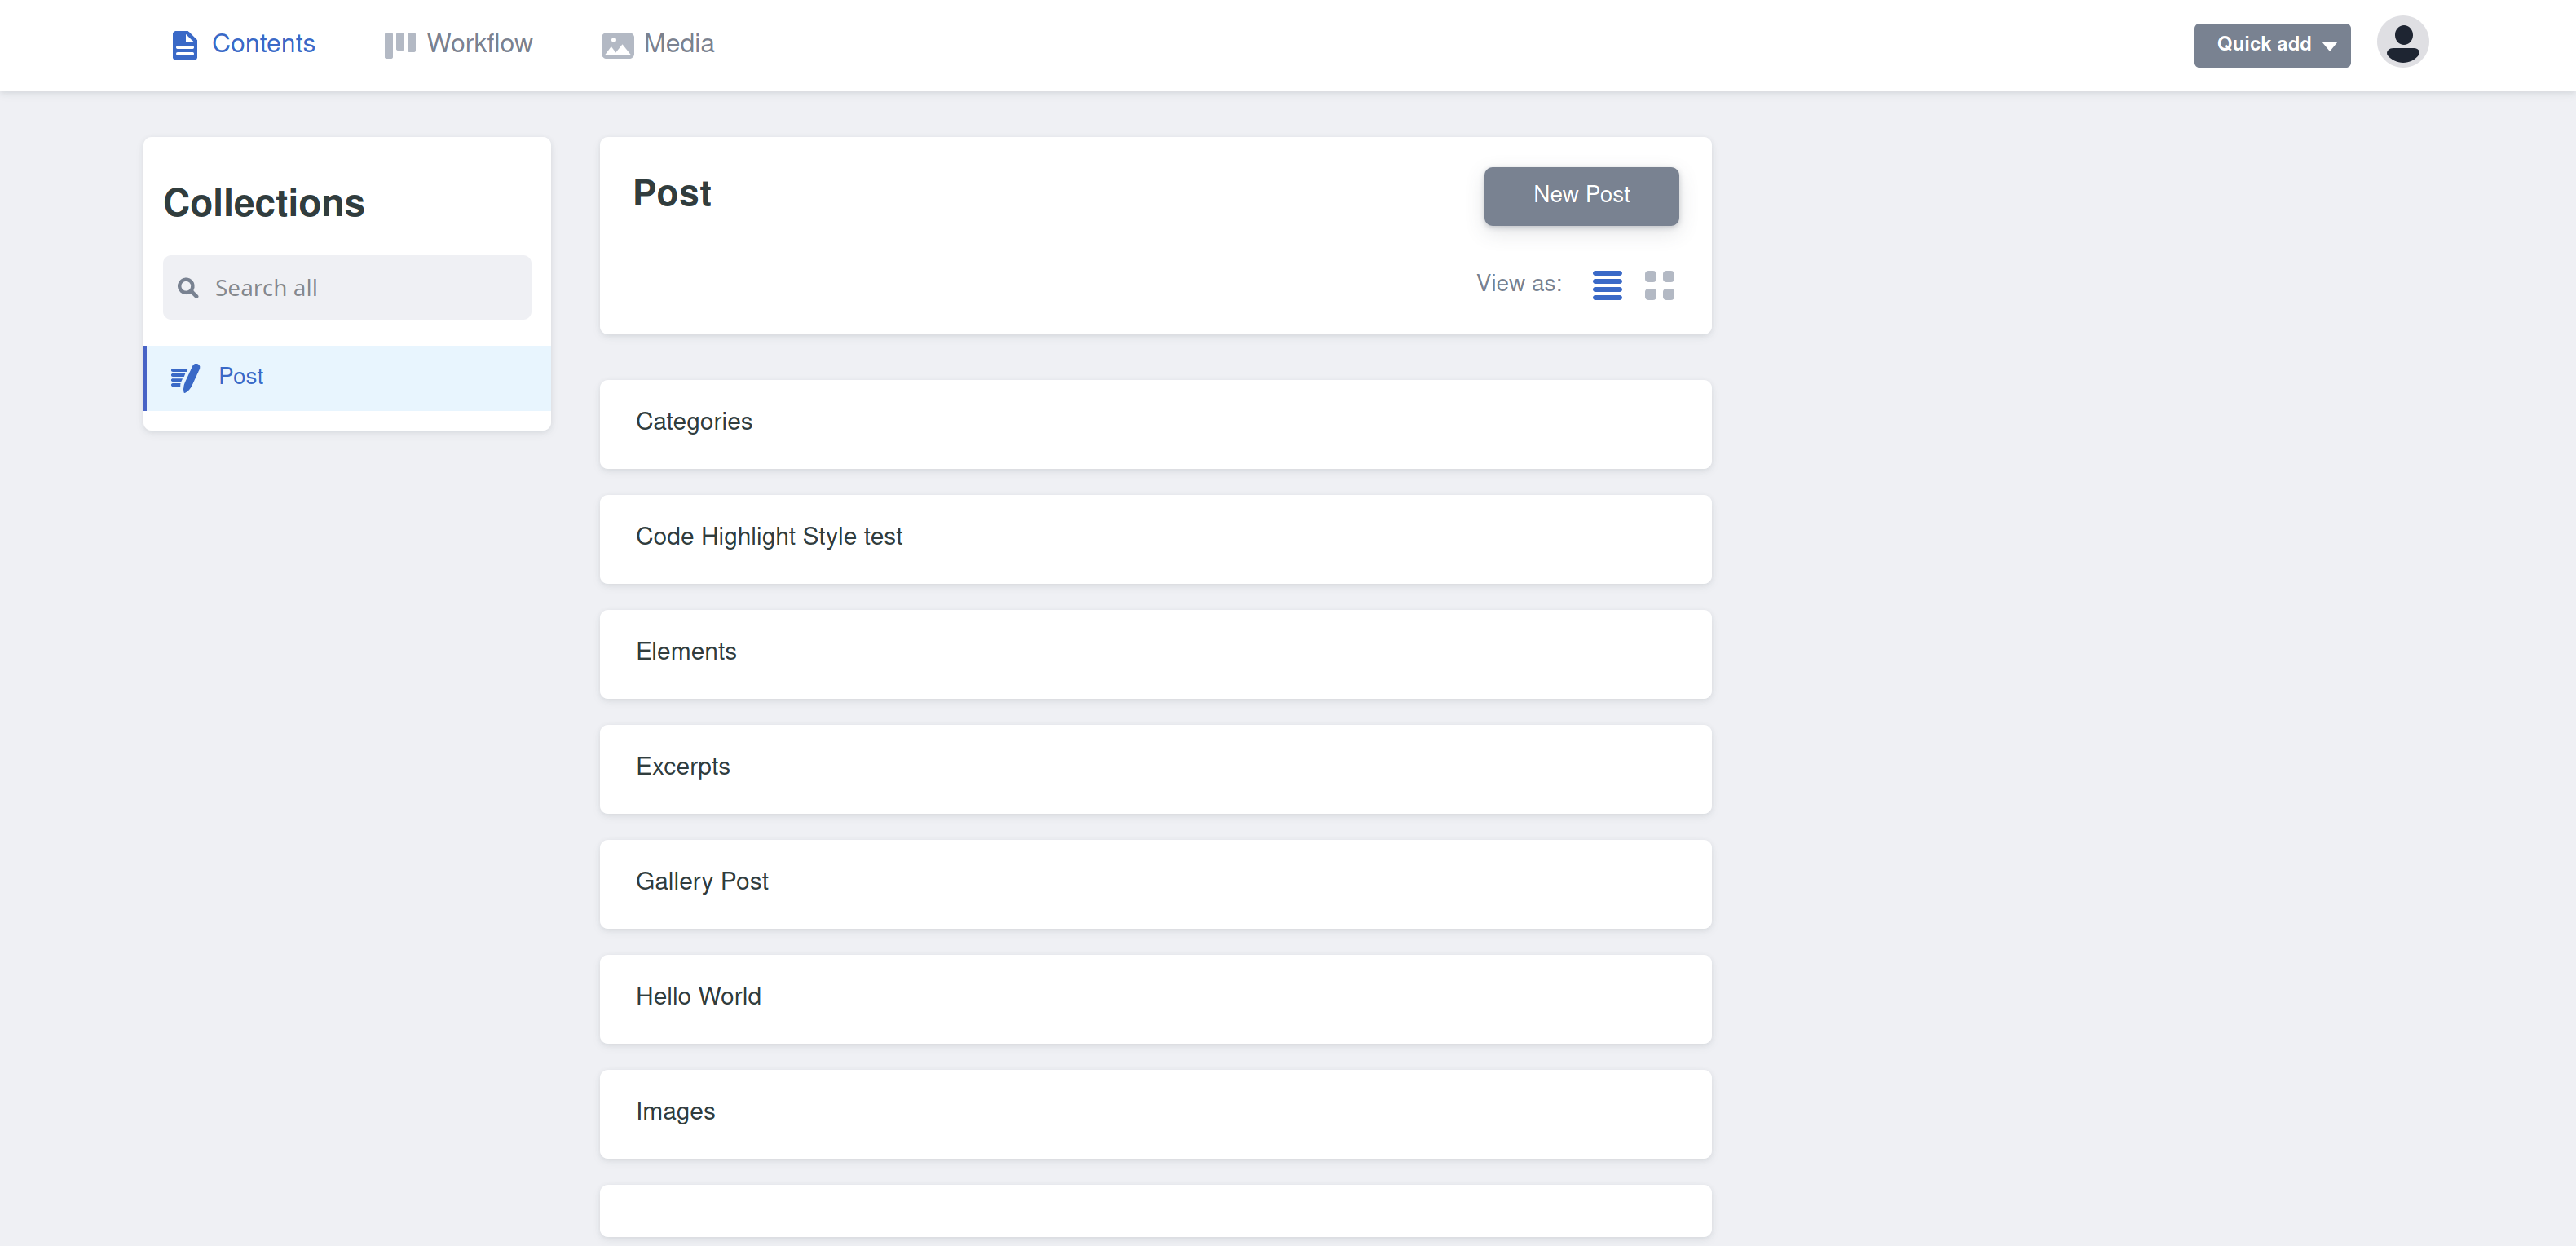
接下来便可以对博客上的文章进行编辑了
.png)
参考内容
- Hexo starter with Netlify CMS and redirects
- Hexo Netlify CMS
- 博客写作攻略 --Hexo+Github+Netlify+CMS
- netlify-templates/hexo-cms-example
- 使用 Netlify CMS 作为博客的 CMS
- Gatsby | Netlify CMS | Open-Source Content Management System
- Configuration Options | Netlify CMS | Open-Source Content Management System
- netlify/netlify-cms